
- Install Git: https://Git-scm.com/
- Install Visual Studio Code (VS Code): https://code.visualstudio.com/Download – you can use something else if you want, but I’ll be working with it.
- Have Azure DevOps organisation and Project dedicated to this: https://dev.azure.com/. Also, you must be able to use Repos in Azure DevOps. Again, you must create it or ask the responsible department to do it.
- In Fabric tenant settings, these settings need to be enabled*:
*at least the first one; others depend on company policy. Moreover, restricting it to specific security groups is preferable.
- You must be able to create a workspace in Power BI Service and assign a Premium/Fabric Capacity (or ask someone responsible for it to do it).
- Your Azure and Power BI accounts must be registered to the same user, e.g., odeta@dragonsdata.com.
- You need to have at least one Power BI report.
- Enable a preview feature “Power BI Project (.pbip) save option” in Power BI Desktop.
- Tools installation:
- After installing Git, make sure that it is installed correctly. You can do that by opening Command Prompt (search for cmd) and running:
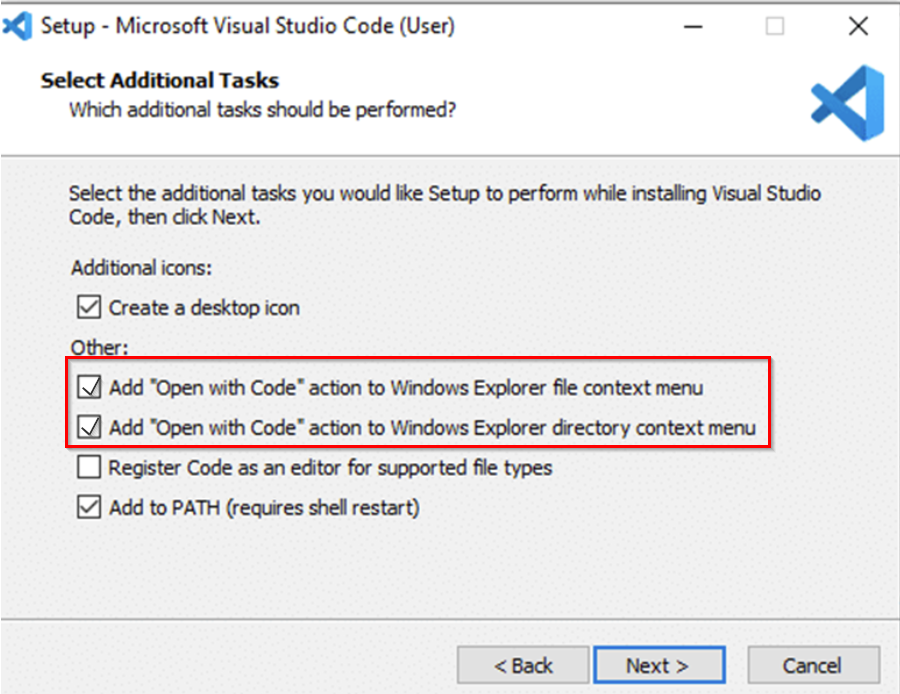
Git –version - When installing VS Code, it is useful to select these options:
- After installing Git, make sure that it is installed correctly. You can do that by opening Command Prompt (search for cmd) and running:
- In Power BI Desktop (check if the Step 7 from the Prerequisites is done):
- Have a Power BI report on your local machine (e.g., on your laptop) in a folder** (e.g., your project folder). For example, the folder can be called “Git and PBI Integration Demo”.
**this will be your local repository. - Open the report and save it as a project (PBIP).
- Have a Power BI report on your local machine (e.g., on your laptop) in a folder** (e.g., your project folder). For example, the folder can be called “Git and PBI Integration Demo”.
- If you’re doing this for the first time, in Command Prompt, run this:
cd path to your folder, e.g.:cd C:\Users\Odeta\Desktop\PBIP FolderGit config user.name “Your Name”, e.g., Git config user.name OdetaGit config user.email “Your Email”, e.g., Git config user.email odeta@dragonsdata.com
- In VS Code – This is how you create a local repository
- Initialise the repository from VS Code (done only once per project) by right-clicking on the folder from Step 2 (“Git and PBI Integration Demo”) and choosing “Open with (VS) Code”.
- Go to Source Control and
- select “Initialize Repository”.
- Stage everything.
- Enter the commit message and commit.
- In DevOps – this is how you create a remote repository:
- Select the proper Organization***.
- Open the specific project***.
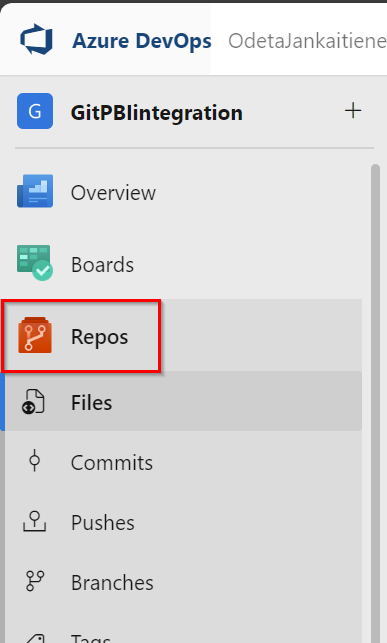
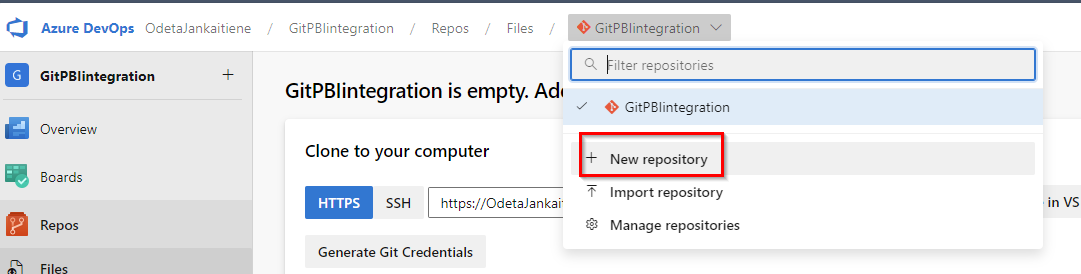
***these needed to be created as stated in prerequisite’s Step 3 - Go to Repos and create a new repository****. For example, call it “GitPBIintegrationDemo_OJ”, where OJ – initials.
****if you select “Add a README”, you must create a README.txt file in your project folder on your local machine. - Copy the https address.
- In VS Code – this is how you connect your remote and local repositories:
- Open the source control menu
- Add remote (… > Remote > Add Remote…)
- Paste the copied https address from DevOps Repos and press Enter
- Enter a name for the remote repository, e.g., “GitPBIintegration_OJ_local”, and press Enter
- Provide your credentials when prompted
- Press “Publish Branch”.
- Now you can see the same PBIP files in DevOps (after page refresh)
- In Power BI Service – this is how your Power BI files land to Power BI Service and are synced with Git:
- Create a dedicated workspace and assign it Premium/Fabric capacity (make sure that Step 5 from the Prerequisites is done)
- Setup Git integration in the Workspace Settings window:
- Organisation – the one from DevOps,
- Project – the one from DevOps,
- Git repository – one from DevOps (“GitPBIintegrationDemo_OJ”)
- Branch – main
- Press “Connect and sync”
- Refresh a dataset
I was able to find good information from your articles.
Great info, thank you for sharing it. Is this feature available in Premium Per User workspaces as well?
Yes